This article is for Swile administrators. Custom criteria allow you to manage your Swile subsidies in detail (including mixed subsidies, reimbursement on invoice and envelope-type shop): you can adjust beneficiary eligibility and vary the amounts allocated based on a chosen criterion. Expand the question below that interests you.
👀 What are Swile custom criteria for?
On Swile, you can create custom criteria to manage your subsidies in detail: status, family quotient, start date at the company, work location, hierarchical level, and so on.
These criteria then let you personalise the allocation conditions for your mixed subsidies, reimbursement on invoice and envelope-type shop. You can adjust both beneficiary eligibility and the amounts allocated according to a chosen criterion.
💡 What about dependants?
Dependants (children and partners) linked to your beneficiaries can also be used as criteria when setting up your Swile subsidies. However, they are managed in a dedicated section, separate from custom criteria.
🧩 What are the 4 value formats available on Swile?
When you create a custom Swile criterion, you choose one of the following 4 value formats:
- A number
- Yes / No
- A date
- A selection from a list of options you define
➕ How do I create a custom criterion on Swile?
- Step 1: Go to the Employees page, then the Criteria tab.
- Step 2: Click on + Create a criterion, then select Custom criterion.
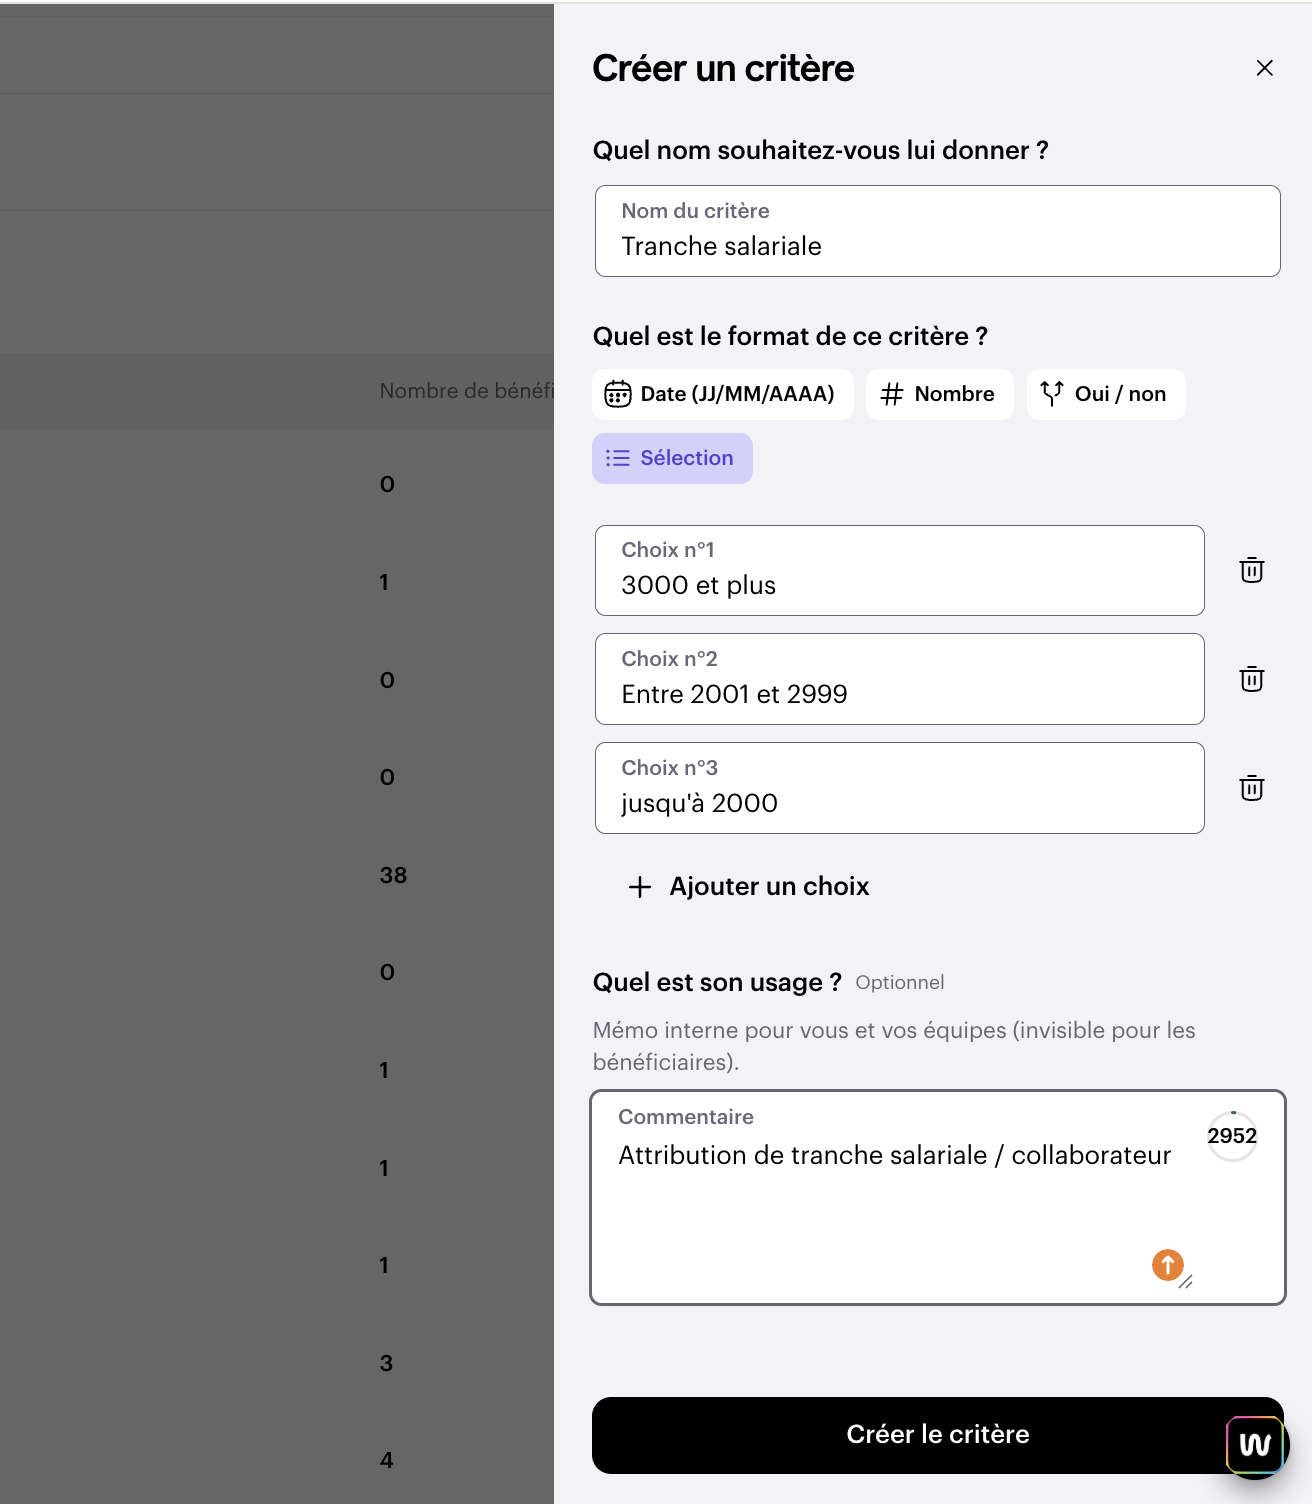
- Step 3: Give your criterion a name.
- Step 4: Choose its type from the 4 options: Date, Number, Yes / No, Selection.
You can also add a description (optional), which is only visible in your Swile admin area. Once created, the criterion will appear in the list of criteria.
Good to know depending on the type of Swile criterion
✅ Selection-type criterion: this lets you assign a value from a predefined list (status, salary band, work location, etc.). Give each option a name and set at least two options. You can add more using + Add an option.
📆 Date-type criterion: this lets you assign a date to each employee. You decide what it means in the description (for example: company start date).
👍 👎 Yes / No-type criterion: set the desired condition in the What is it for? window, then enter Yes or No for each employee.
🔢 Number-type criterion: enter a number for each employee and specify what it means in the description (for example: salary, family quotient, etc.).
📽️ Step-by-step video guide
✏️ How do I edit an existing custom criterion on Swile?
To edit a custom Swile criterion, click on the desired criterion in the list, then click the pencil icon in the Criterion description. For all your criteria, you can edit the title and the description, which are for your use as an administrator.
For Selection-type criteria, click the pencil icon to:
- remove values by clicking the cross (X) next to the relevant option;
- add new values using + Add an option.
Confirm your changes by clicking the small tick.
👥 How do I assign a custom criterion to employees on Swile?
Once the criterion is created, click on the desired criterion, then on Enter a value. You have two options.
👤 Method 1: individually, from the employee list
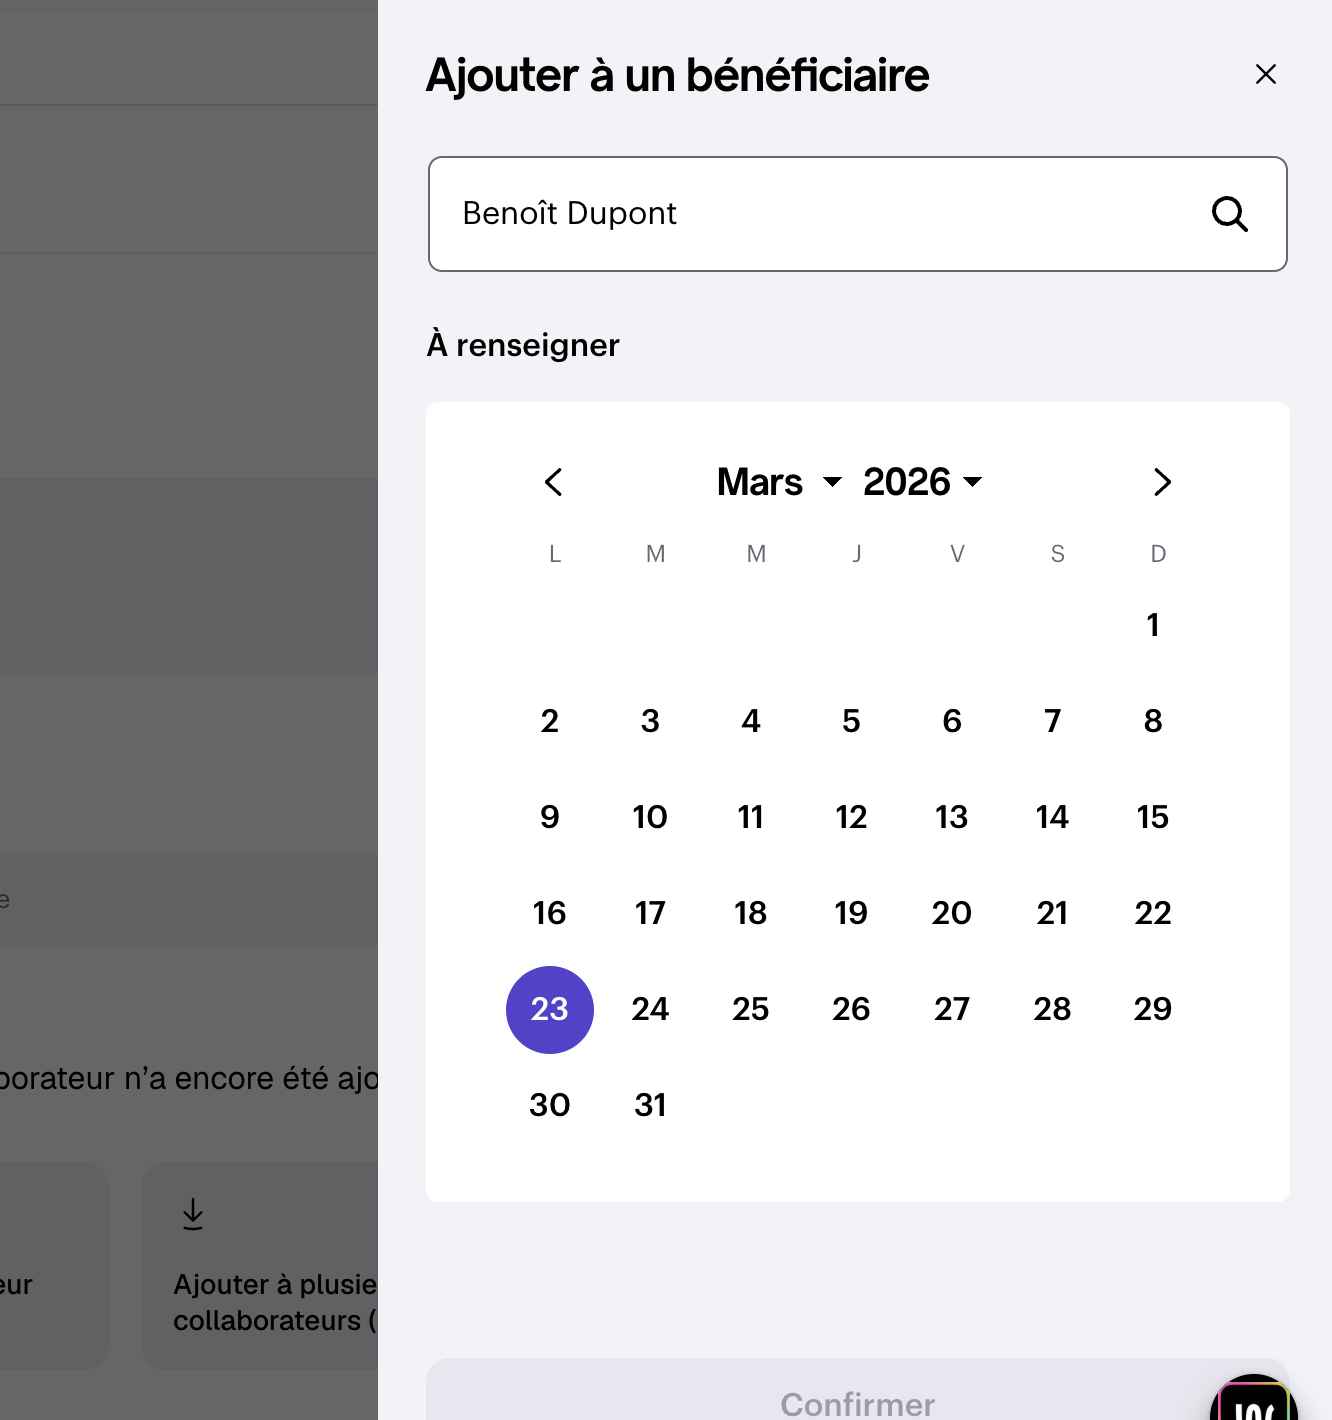
Click on From the employee list, search for the desired employee and enter the criterion value.
📂 Method 2: in bulk, using a CSV file
Click on From a CSV file.
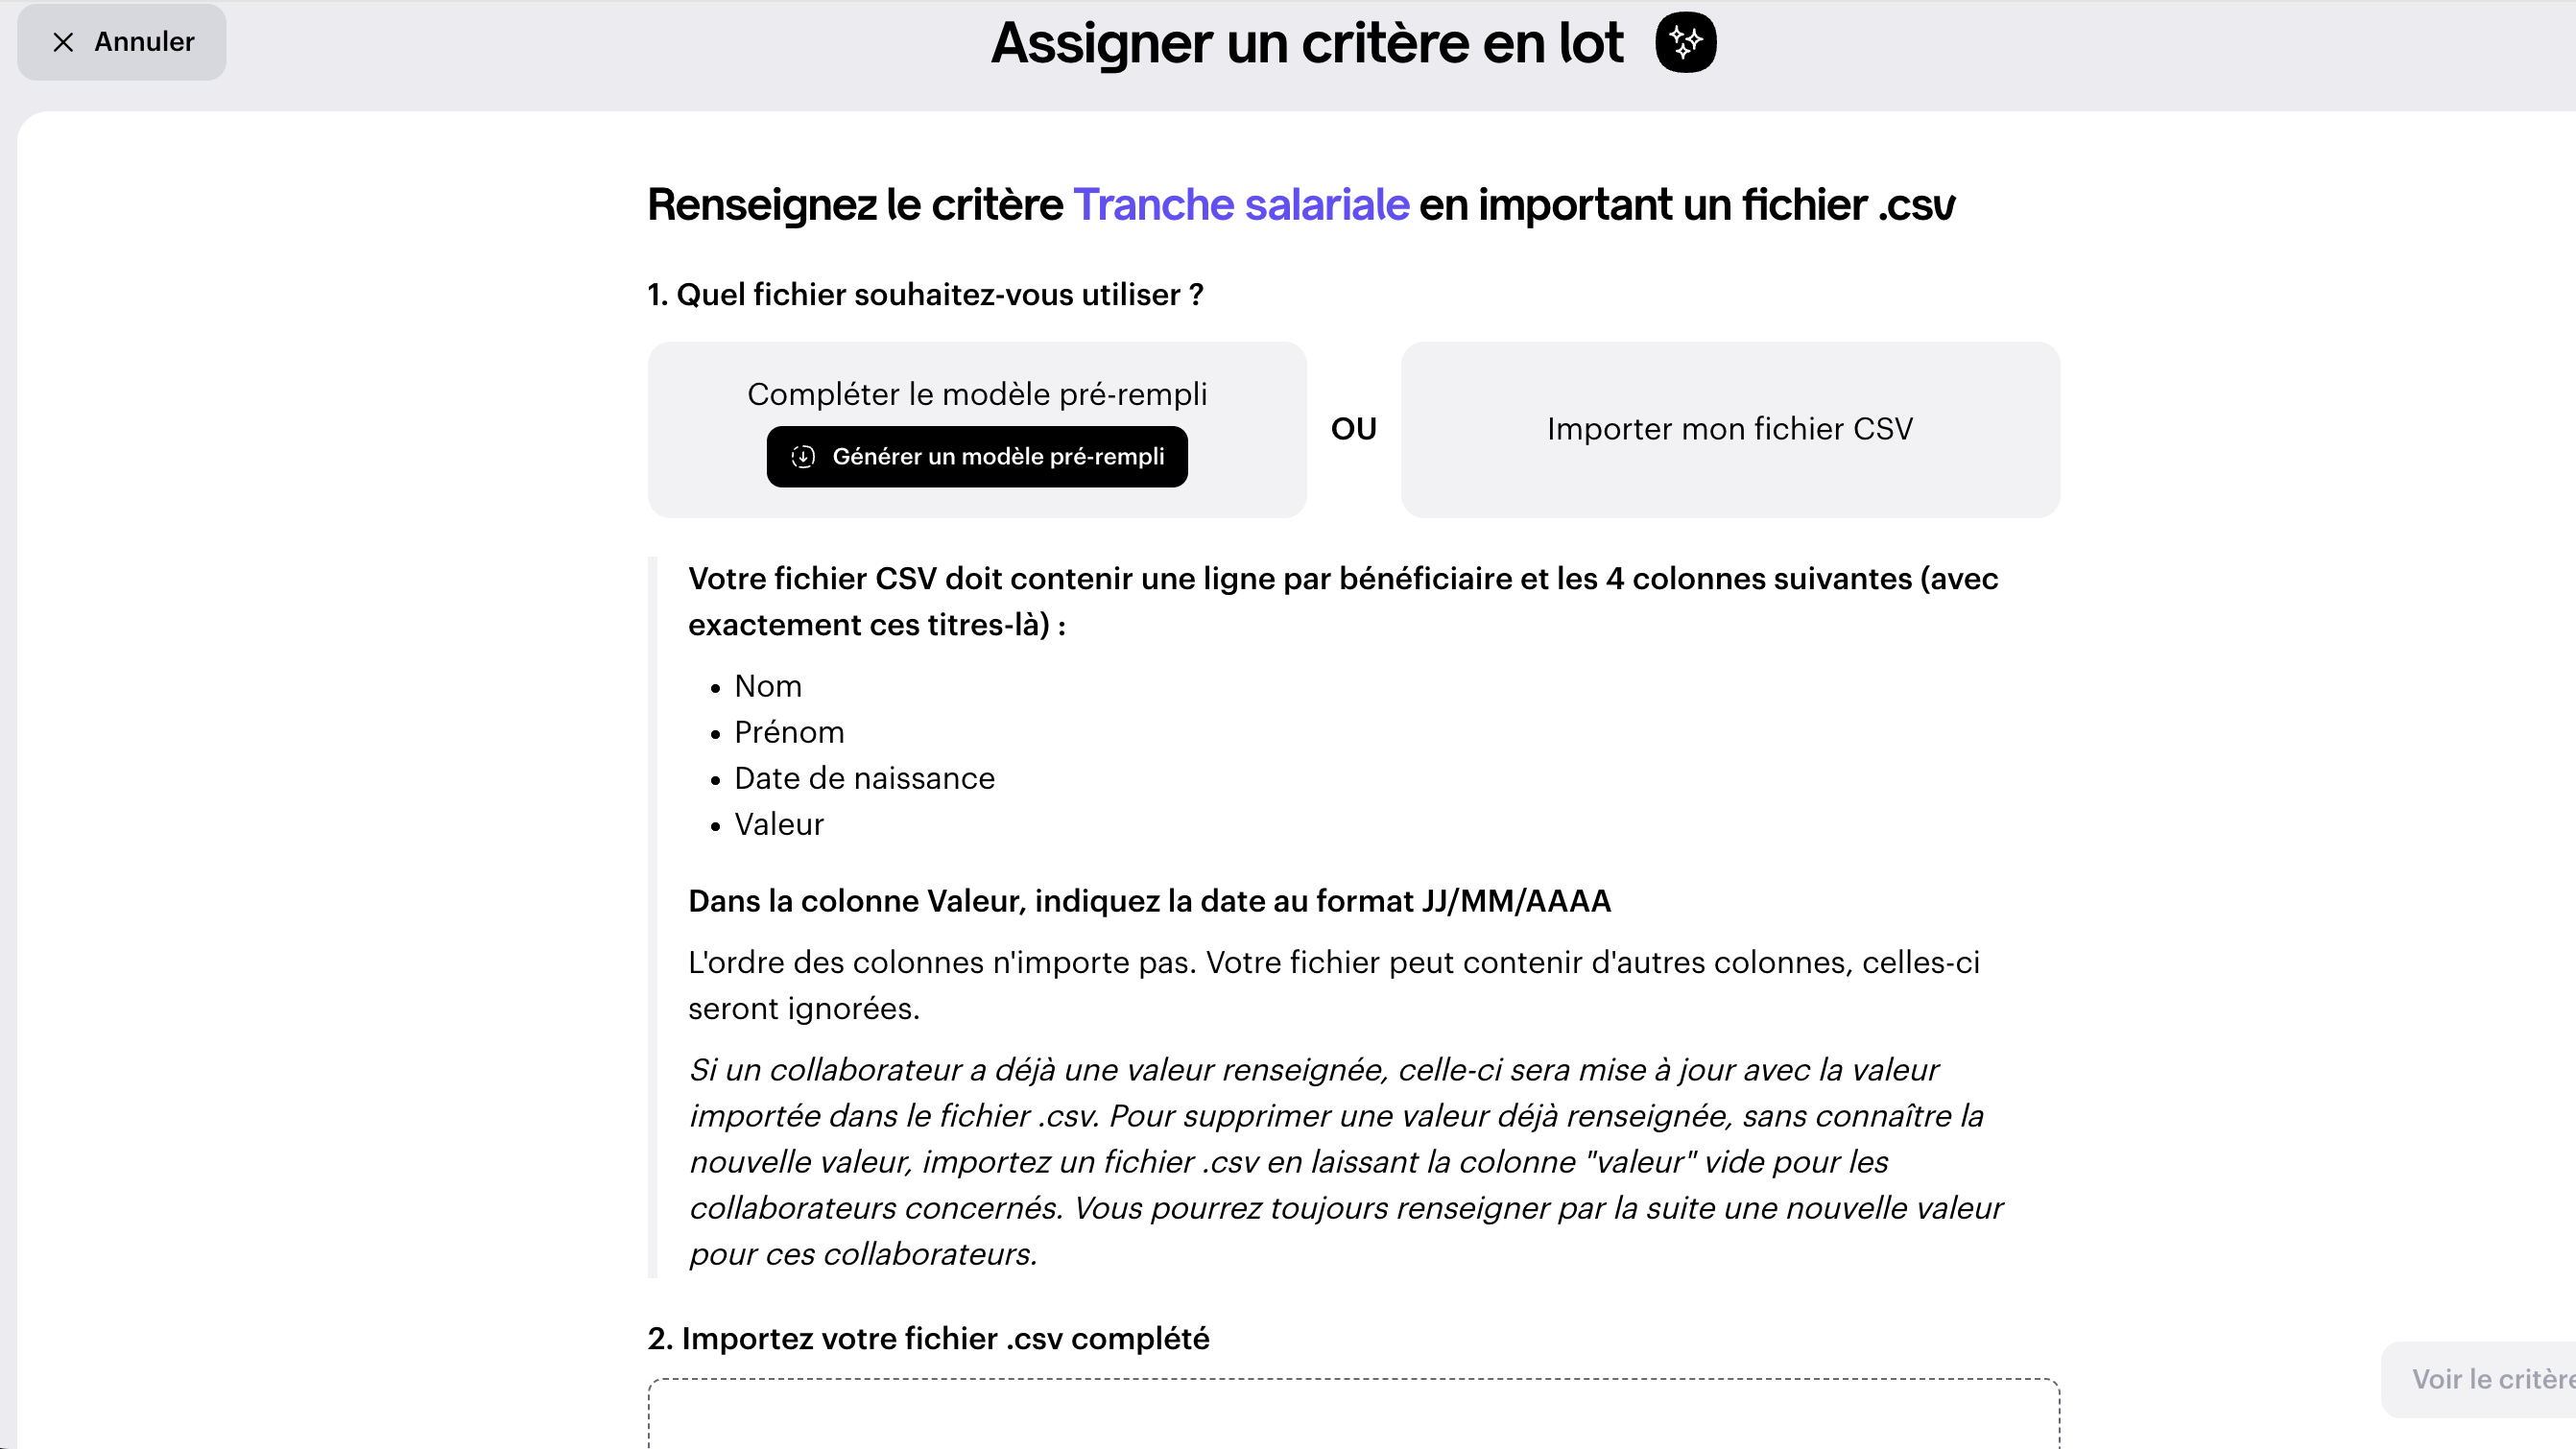
Download the file containing your employees by clicking Generate a pre-filled template. Fill in the Value column following the instructions shown as examples: the guidance will automatically adapt to the type of criterion and the fields already filled in.
Then drag the file into the interface and confirm: the criterion will be applied in bulk to your employees, according to the value entered on their row.

📝 Another method: individually, from the employee's profile
Find the desired employee in the Employees tab, then click on their row. In the General tab, under the Criteria section, click on Enter a criterion.
A drop-down menu will appear with all the Swile criteria you have created. Select the relevant company, then the desired criterion from the list. Enter the value you want, then confirm: the update is immediate.
The list of assigned criteria appears on the Employee page, in the General tab, under the Criteria section.
💡 Good to know
On Swile, you can assign as many custom criteria as you like to a single employee.
🛠️ How do I edit or remove a Swile criterion assignment?
To edit or remove a custom Swile criterion assigned to an employee, click on the three dots … at the end of the relevant criterion's row, then click Edit or Delete as needed.
You can also view the list of employees assigned to a criterion at any time from the Criteria tab, by clicking on the desired criterion. From this page, you can also edit the value entered for an employee or remove them from the list by clicking on the three dots … at the end of their row.
Comments
0 comments